

Interiors are all about the greenery these days.
Every interior photoshoot on every blog and in every magazine features a few strategically placed houseplants; tradefair stands are dressed up with jungle-walls; greenhouses are turned into restaurants; creating full-on interior urban jungles is no longer the exclusive terrain of the hermit down the street (who you suddenly feel like you should be asking for botanical advice).
 |
| Photograph by Livet Hemma: Ikea |
There are so many reasons to have houseplants: the hint of nature in your home; the improved air-quality and healthier moisture levels; the overall beauty of plantlive... What's not to love?
Not so sure about the botanical trend? Read this blogpost for 6 reasons to get houseplants now (5 of which are backed by science)
 |
| by House of Thol |


all photographs from the House of Thol Instagram account
Anyway, fear not. -All is not lost.Although we'll probably kill a lot more plants before truly mastering the art of plantcare, over the last three years we've managed to create a pretty green home and a small urban jungle in our studio.
And... if we can do it, so can you! - Here are 7 tips to help you along.

Luckily some plants are pretty resilient when it comes to bad plantcare. Killing those plants might even involve some skill (from personal experience: it can be done).
A few of the easiest plants to maintain are Spider plant, Devils' ivy, Aloe Vera, Peace Lily and Snake Plant.
 |
| illustration by House of Thol |
You know the little tag on each store-bought plant? Don't throw it out.
You'll probably want to take it off because in general it doesn't look very pretty, but make sure to keep it somewhere so you'll know how to properly care for this plant.
A plant doesn't always come with a tag. If it doesn't, make sure you find out the type of plant, and don't forget the name (you can add a nice-looking label).
If you run into trouble later on, you can google away and spend hours and hours researching the yellow tips / white spots / brown edges of your Musa.
 |
| Photograph from our Instagram |
If you're anything like me, your first thought when looking at a houseplant is 'when was the last time i watered it?'.
I always forget. I forget right up until the moment the leaves start to droop, which is when i decide i'm too late and try to 'save' the plant by throwing in a bucketload of water. Which drowns it.
What most people don't realise, is that houseplants sooner die of getting too much water than of drying out.
When dried out, a plant can pretty often be revived with the proper care. A drowned plant however, usually suffers from irreversably rotted roots and has passed the point of no return.
There are a gazillion helpful tips out there to make it easier to water your plants: from apps to grandmothers' tricks.
We based our natural watering system Waterworks on ancient irrigation techniques and it works wonderfully, we even use a Waterworksset (with a small cone) in our Cactus, and it's thriving. More about Waterworks here.
 |
| Waterworks by House of Thol | photograph by Masha Bakker photography |
Use your plant-tag or google to read up on the best situation for your plant: most plants like their sunlight to be indirect and might even develop burn-spots when put in a brightly lit window-sill. Although very few plants thrive in the dark, there are plants that can live happily in badly-lit places like bathrooms.
The ideal place for plants is about more than sunlight: they often don't like drafts or being touched by the door every-time it opens, and not every plant is happy too close to the central heating.
Also: plants usually do not like to be eaten by your pet.
Note that some plants (like the peace-lily) can be toxic to cats and dogs and should be placed somewhere the pets can't reach them. (some plants are even toxic to humans, so keep those out of the reach of children).
 |
| from Pinterest - unable to find the original source |
This might sound daunting, but most plants won't last long if you keep them in the plastic container they came in: they'll run out of space or nutrients and you'll need to repot them.
Knowing when or how to re-pot your plants is one of those things that doesn't come naturally to us black-thumbed people, but i'll promiss you: it's worth the effort, most plants really thrive when their roots have enough space in a soil filled with fresh nutrients.
There's this pretty good Wiki-how about repotting plants.
When repotting, always use a pot with holes in the bottom and/or add a layer of large stones underneath the soil so it's well-drained.
NB Make sure to run a quick google-search on your plant. Some plants can only be repotted in certain seasons or they won't make it.
 |
| Photograph from the Wikihow 'Repot a plant' |
The plants in your house come from different habitats. Some will originate from a jungle-like environment, while other (for example cacti) stem from a desert-like area.
It will come as no surprise that those different types of plants thrive in different types of soil.
Get the right kind for your plants and don't forget to fertilize it once-in-a-while (if your plant likes it).
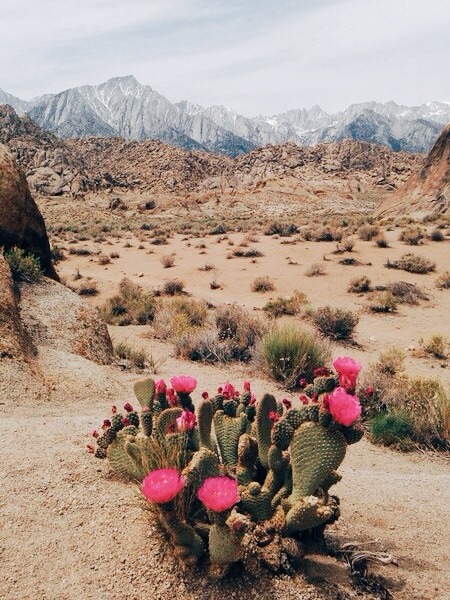 |
| Alabama Hills | By Forest Mankins / a life alive |
Imagine being a plant: you're happy in the garden-centre: surrounded by fresh air, warmth, other plants of all shapes and sizes and workmen to cater your every need. But then... suddenly someone picks you up, moves you around, has you wrapped, possibly keeps you in a trunk for a while, after which you're gifted to someone who cannot even keep a cactus alive.
Most plants are not a big fan of being moved: they'll need time to adapt to their new environment and growth will stagnate for a while.
Don't give up on those plants. Give them time. And love. And play some classical music for them, they dig that (click).
 |
| Plant Gang | photograph by Tiffany Grant-Riley for Urban Jungle Bloggers |
Good luck keeping that greenery alive!
Any tips you'd like to add?
Don't hesitate to comment on this post, i'd love to hear them.


